
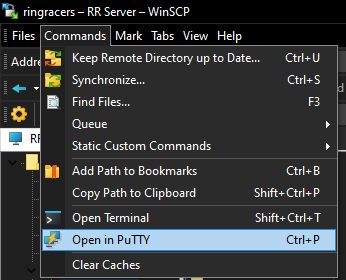
With WinSCP still opened and logged into your VM, You'll see a tab at the top called "Commands". Click on it and you'll see a option that allows for you to access your server teminal through putty (in this case the "open in Putty" option).
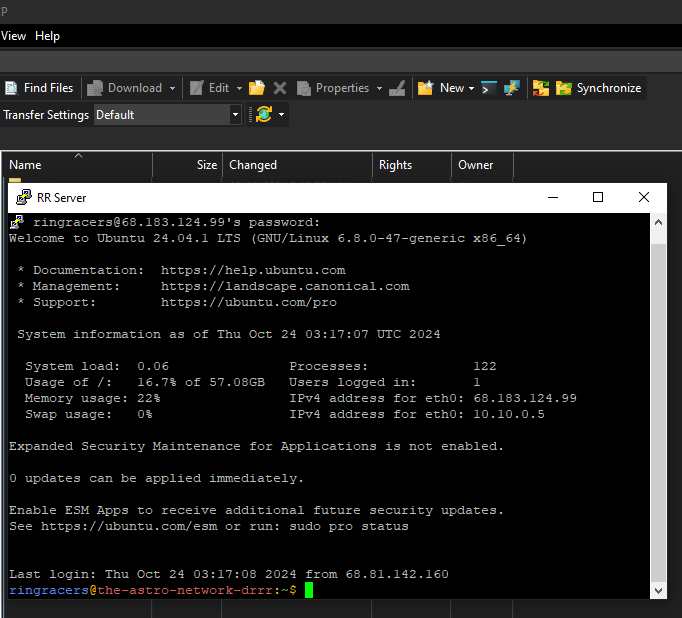
Click on it and you'll be greeted to your VM's terminal asking to enter it's password. Don't worry if nothing shows up as your typing it out. This is for security purposes to ensure no will try to steal it. Go ahead and do so and once logged in, You should come to a screen showcasing your VM's system specs and statistics.
With you now logged into your terminal as the root admin, It's recommended that We create another user that'll specifically be for hosting your ring racers server. For the sake of this guide in keeping things as simple as possible, we'll name it “ringracers” for now. To do so, Type in
adduser ringracers
From there, It'll ask to set up a password for it as well as other user info questions. These aren't mandatory so you can skip them by pressing enter for each one after setting your ring racers password. Make sure to set it to one you know you'll remember down the line for future purposes or make a note of it somewhere where it's only accessable to you and no one else. With the ringracers user now added to your VM, You'll then need to give it admin priveleges. This can be done by typing in
usermod -aG sudo ringracers
This is one of the key steps in what you'll need in being able to run terminal commands that would only be limited to the root user. This command overrides that and grants admin permissions by using the “sudo” command. With both the ring racers user being created as well as it having admin preveledges, We can close out of the current putty session and head back into WinSCP. From here you'll need to open up a new tab and follow the same steps back in part 3 in entering your VM Credentials, Only this time you'll be using the ones you created for the ring racers username. In this case it should look like something along the lines of this.
Once finished, Save it as a new site and log into your VM again through WinSCP using your Ring Racers Username. With us now back inside and Moving onwards with adding everything else we'll need, Starting with Byobu, We'll go ahead and install that first onto your VM. This is what will be used to access the game's console window to be able to check up on the server as you normally would in-game weather it be to input game commands to directly talking to players inside your server. Go ahead and login to your newly created ringracers user account through putty using the "open in Putty" option again and from there, type in your server terminal window
sudo apt install byobu
For security purposes, it'll ask to put in your password again. Once entered, it'll search for it and ask to confirm if you want to install it onto your VM with the options to either type "y" for yes or "n" for no. go ahead and type in y, Press enter and it'll begin to install byobu onto your VM. Once it's finished, Now comes installing both the dependencies and extra programs needed in compiling the game. To do so, Copy and paste this into the terminal window.
sudo apt-get install build-essential git p7zip-full p7zip-rar nasm libpng-dev zlib1g-dev libsdl2-dev libsdl2-mixer-dev libgme-dev libopenmpt-dev libcurl4-openssl-dev make cmake htop libogg-dev libvorbis-dev libvpx-dev libyuv-dev tmux unzip wget
From there, it'll start searching for each of what's listed above and begin the installation process. Once everything is installed, Now comes actually compiling and installing Ring Racers on your VM. For starters, we'll need to get a hold of the source code first. To do so, Head back into your terminal window and enter in the command listed below
sudo git clone https://github.com/KartKrewDev/RingRacers.git
This'll make a copy of the source code that's hosted within the link above and add it directly to your VM. With the source code now added, We'll also need to create an install folder for the game as this is what it'll search for upon trying to boot it up later on in this guide. To do so, Go ahead and type in
sudo mkdir .ringracers
This'll is where you'll be placing the build of the game itself on your VM once it's compiled. Moving on, We can now head over to the main source code of the game by typing in
cd RingRacers
This'll change the current folder directory you were in previously to the one you just typed in on the terminal window. With us now in the source directory, We'll need to make a build folder for it. This is where you'll find the game itself once it's fully compiled. To do so, Go ahead and type in
sudo mkdir build
From here we need to navigate to it using the cd command again, In this case, it'll be
cd build
With us now inside along with the dependencies we installed earlier, Now we'll need to create the cmake files for it as this is a key step in being able to properly compile the game. To do so, Type in
sudo cmake ..
This'll begin the process in creating the files needed in being able to make a build of the game which should be relatively fast. With that being said now comes compiling the game itself. To do so, Simply type in
sudo make -j$(nproc)
This'll begin the process in compiling everything for the game which should only take a few minutes for it to finish. Once the process has successfully compiled everything, We'll need to navigate to where the build of the game itself is. This can be done by typing in
cd bin
Now that we have the game fully compiled, We can now move it into the .ringracers folder that we created earlier. To do so, type in
sudo mv ringracers /home/ringracers/.ringracers
With the main build now inside the install folder, Navigate back to the "ringracers" directory by typing in "cd". From here, We'll need to get a hold of the game's main file assets. This can be done using the “wget” command and typing (Copying and Pasting this also works) this into the terminal
wget https://github.com/KartKrewDev/RingRacers/releases/download/v2.4/Dr.Robotnik.s-Ring-Racers-v2.4-Assets.zip
This'll download what we need directly onto your VM. With the ZIP file for the assets on hand, We'll need to extract it to the .ringracers folder. To do so, type in
unzip Dr.Robotnik.s-Ring-Racers-v2.4-Assets.zip -d /home/ringracers/.ringracers
If all done correctly, Both the build of ring racers we compiled earlier, along with the assets we just now extracted should all be within the .ringracers folder. For the sake of testing purposes, We'll need to make sure that we can be able to boot into the game through your VM now that everything is set in place for it. This'll also be a good way to test things out on the chance if you plan on having it set up as a core based server with no mods. Starting in making sure that you have proper access permissions, right-click on the .ringracers folder. From there, click on "properties" and make note of the "Permissions" Section. You'll see a number that's listed there. change it to 0755 and click on "Ok".
With your permissions now set in place, We can now boot into the game to test and make sure that everything works. We'll first need to navigate to the .ringracers folder through the terminal. This can be done by typing in
cd .ringracers
With us now inside, We'll need to put in the command that'll allow us to boot up the game as well as having it set as a dedicated server which will allow it to show up on the master server. To do so, Type in
./ringracers -dedicated
From there, It'll begin booting up the server, along with the files needed that we downloaded earlier from the assets. If all went accordingly, You've successfully installed ring racers onto your VM. Knowing now that everything is set in place and that we can be able to boot into the game, shut down the game for now by typing in quit and We can proceed into the next set of steps from here.
With the game now compiled and installed onto your VM, We'll need to add the mods themselves onto it as well as installing a HTTP server that'll allow for automatic downloads for addons upon entering your ring racers server. This'll also act as your server repository for keeping your addons stored. Starting with adding your mods first, head into winSCP and navigate to the game's install folder on your VM (In this case the .ringracers folder), Once inside, We'll need to make a "mods" folder. This'll help into keeping specific addons organized into thier respective categories for your server repo. Once inside, We'll need to make another set of folders. As for the folder names in mind, you'll need ones for...
With each folder is made, Go ahead and add whatever mods you intend to have loaded onto your server repository into each folder respectively. Leave the index folder empty for now as we still need to set up a HTTP file source first for the next set of steps later on. Now we need to add the same addons we just added but instead of in the "mods" folder, we'll be adding each addon file all together in the "addons" folder. This is what the game will search for upon loading mods for your server. More will be explained later on.
With all of addons inside, we can move on into installing the HTTP file system on your VM. To do so, you'll need to install a program onto your VM known as Nginx. To get started, Go back into your server terminal through putty and from there, type in
sudo apt-get install nginx
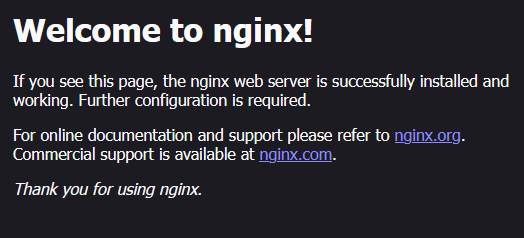
From here, Simply follow the prompts afterwards to finish the install. Once done, We'll need to test and see if it installed properly by opening up your web browser and typing in your VM's IPV4 Address. You'll know it worked if you are greeted to the Nginx welcome page.
With Nginx installed, Now we need to edit the config file to have it set to where it'll search for the index folder that you created in the previous step, as well as creating a shortcut that'll allow for your HTTP server to be linked with it. to do so, Go into your server terminal and type in
sudo nano /etc/nginx/sites-available/default
A new screen should pop up afterwards that should look like this.
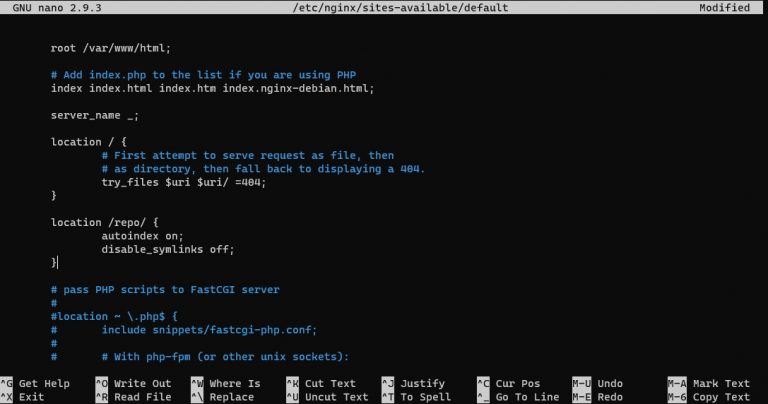
Once opened, Navigate through it using the up and down arrow keys until you come the section that says...
location / {Directly under that, Add this to it.
location /repo/ {If enter correctly, it should look like this.
location / {From there, Press ctrl+O (Hold the ctrl key then press O) to save the config file and once done, Press ctrl+X to exit. With the HTTP set in place, Now comes creating a shortcut for it that'll link it to the game's index folder. To do so while still in the server terminal, type in
sudo ln -s /home/ringracers/.ringracers/mods/index /var/www/html/repo
From here, press enter and Once done, You'll need to restart the service for Nginx in order for the changes to take effect. To do so, Simply type in
sudo service nginx restart
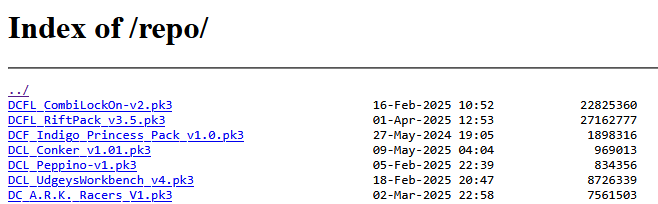
For testing purposes, add any mod of your choosing to the index folder in WinSCP and from there, Go back into your web browser and type in you server's IPV4 address again but this time, Add /repo/ at the end of it (http://youripv4address/repo/). If all went correctly, You should see the addon you just added to your index folder in your HTTP repo.
With your server's HTTP file repo setup, Now you'll have to add the link for it to the game's config file for your server. To do so, Go back into winscp and navigate back to "/home/ringracers/.ringracers" and from there, You should see a file named "dringconfig.cfg". This is also the file where you can be able to set up other aspects of your server settings from cutomizing the player count, editing the name of your server, etc. Once opened, scroll through it until you see a section that says
http_source ""
Within the two quotation marks, copy and paste the url of your HTTP repo into them. it should look something like this afterwards.
http_source "http://youripv4address/repo/"
From there, you can save and close it.
This is a bit of a minor step but it's one that'll be helpful in managing and updating addons for your server repository weather it be for adding or removing them without the need of having to manually update the index folder each time. This script will basically copy all of the addons that's currently inside all of the seperate folders (characters, tracks, etc.) and paste them directly into the index folder automatically without the need of you having to do it yourself. Moving forward as to how to set up the script itself, Head back into your terminal window and type in
sudo nano ~/.ringracers/update.sh
This'll go ahead and create a new blank script file. From here, You can proceed into copying and pasting this into the script.
#!/bin/bashWith this now set in place, Go ahead and save it by using "ctrl+o" and then exit out of nano by using “ctrl+x”. To test in making sure that the script works, We'll need to use the “bash” command to execute it. In this case, It'll be
bash ~/.ringracers/update.sh
Press Enter and if done correctly, Your server repo should now be updated with any new mods that you've added or removed.
On the chance if you get a error saying ln: addons/index/: hard link not allowed for directory, This is due to one or all of the other seperate folders not having any addons inside of them. To ensure that the script runs with no issues, make sure to have at least one addon in each folder respectively outside of the index folder itself. With all of what we need setup for Nginx, We can proceed onwards into the next phase.