
"Get a load of This!"
Ever wanted to host a dedicated ring racers server of your own but don't know where to begin? If so, This guide will be just for you in getting everything setup in what you'll need to get things running as intended. With the various fixes that was provided by the community since the game's release, Paired with the RC Builds that were provided by the KKD Devs, I'm providing this guide as a way of passing on my knowledge that will allow for other upcoming server hosts to be able to host their own ring racers servers along with the methods needed to ensure that everything runs as intended.
That being said, Before getting started, A few things that you'll need to have on hand first.
Notice: If using Windows 10, This guide will only apply if you signed up for microsoft's extended security program. Otherwise, I'd suggest looking into getting windows 11 or a Linux based OS.
Adding to the Requirements listed above, This guide will also assume that you have a VPS Subscription that you pay for on the monthly basis as this will be needed in order to run your dedicated server. On the chance if you don't, I recommend looking into getting yourself one first. There are many to choose from such as Digital Ocean, Datawagon, HostHatch, Etc. Depending on which provider you decide to go with, Make sure to pick a subscription plan that's not only within your budget but also has the VM (Virtual Machine) specs needed to ensure that your server can run stably with no issues. I also recommend going with a plan that's based around Ubuntu, Specifically 24.04.2 LTS or higher if you can, As well as one that has specs of at least 8GB of Ram and a Dual-Core Processor. There are others where you can get a bang for your buck for better specs but for the sake of this guide, I only mention this as anything lower than the base specs mentioned can potentially lead to stability issues in the long run so do keep this in mind.
Using the 4th and 5th links provided in the requirements section, Go ahead and download both Installers for both winscp and putty. Seeing as putty will be the more easier one to setup, We'll install that first. Go ahead and open up the installer and follow each prompt into installing it onto your system. Once installed, A window should pop up asking to input you ssh info but you can close out of this as WinSCP will take care of most of this making things more convenient in the long run. With putty installed, Now we can install WinSCP next. Go ahead and open up the installer for it and the same as putty, follow each prompt into installing winscp onto your system. Once installed, You should be greeted to a window asking to input your SSH info.
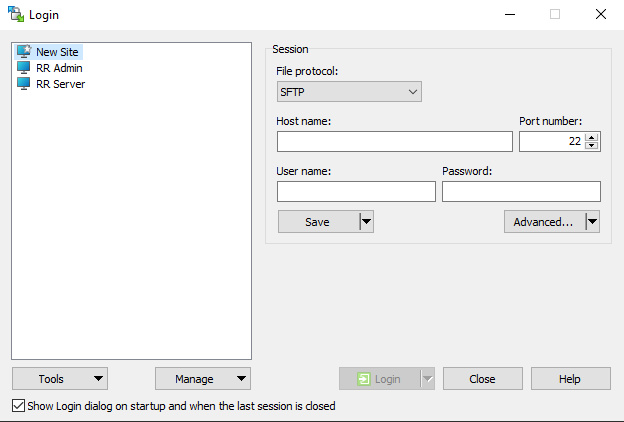
Assuming you followed the segment mentioned in the requirements section in setting up a VPS/VM subscription for yourself, or if you currently already have one, You can find out what your SSH info is by logging into you VPS/VM account and making note of the IPV4 address for it. You'll also be able to find your username which in this case should be "root" as well as the password that you set in place to have terminal access on your server. Go ahead and click on "new site" and type everything out for the hostname, username and password sections. It should look something along the lines of...
If entered correctly, click on save and then click the login tab. Another prompt will come up indicating that an outside user is trying to access your VM. This is a security measure to ensure that hackers wont try to break into your VM which helps into keeping anything stored there safe. go ahead and give it permission to continue and from there, It may ask for your terminal password again which is another security measure to ensure that it's you logging in. If entered correctly, You'll be greeted to your VM's file system showing all of what's inside it.

From here you can navigate through all of what's currently on your VM. While the screenshot above showcases the "ringracers" directory, You'll actually be taken to the "home" directory upon first logging in. Keep this opened as we'll need this for the next set of steps